

How To Set Up A Science Fair Project Board
Science Fair Project Display Boards
Key Info
- For almost every science off-white project, you demand to prepare a display board to communicate your work to others. In near cases you will use a standard, iii-panel display lath that unfolds to be 36" tall past 48" broad. Display boards tin can be found at Amazon and other retailers.
- Organize your data like a newspaper so that your audition can quickly follow the thread of your experiment by reading from height to bottom, so left to right. Include each step of your scientific discipline off-white projection: Abstruse, question, hypothesis, variables, groundwork research, and then on.
- Use a font size of at least 16 points for the text on your display board, then that it is easy to read from a few feet away. It'southward OK to use slightly smaller fonts for captions on movie and tables. For more details come across: Everything You Need to Know About Fonts for Display Boards
- The title should exist big and easily read from across the room. Cull ane that accurately describes your piece of work, but also grabs peoples' attention.
- A picture speaks a thousand words! Apply photos or describe diagrams to present not-numerical data, to suggest models that explain your results, or just to evidence your experimental setup. But, don't put text on acme of photographs or images. It can exist very hard to read.
- Cheque the rules for your scientific discipline off-white. Hither is a list of items that some science fairs allow (or fifty-fifty require) and some scientific discipline fairs don't crave (or even prohibit):
- Your proper name on the display board
- Pictures of yourself
- Captions that include the source for every picture or image
- Acknowledgements of people who helped you
- Your laboratory notebook (some science fairs want you lot to take information technology only during judging)
- Equipment such every bit your laboratory apparatus or your invention
Materials and Structure Techniques
Materials and Construction Techniques
- Use a self-standing display board like these. Brandish boards in blackness or white-colored "foam cadre" (a sandwich made up of ii pieces of polish surface newspaper with a polystyrene (plastic) middle) or corrugated cardboard are readily available at many retailers ranging between $four to $14 per board depending on the material.
- Print out or write your information on white paper that you will adhere to your display board. Be sure to proofread each sheet before you attach information technology.
- Instead of regular paper, use embrace stock (67#) or card stock (110#). These heavier papers will wrinkle less when you attach it to your display board.
- Matte paper is preferable to sleeky because it won't prove as much glare- glare makes your display board difficult to read.
- Mucilage sticks (use enough) or rubber cement work well for attaching sheets of paper to your display lath. Utilize double-sided tape for items similar photographs that may not stick to glue.
- Add together simple visual accents to your board. Do not make the board too busy or it becomes difficult to read. Try these uncomplicated techniques instead:
- Use color construction paper to add accents to your display board. A common technique is to put sheets of construction paper backside the white newspaper containing your text.
- Use borders to describe the audition's attention.
Samples
Samples
Click the Science Fair Display Board image beneath to start the slideshow with a collection of examples!
Slideshow Images
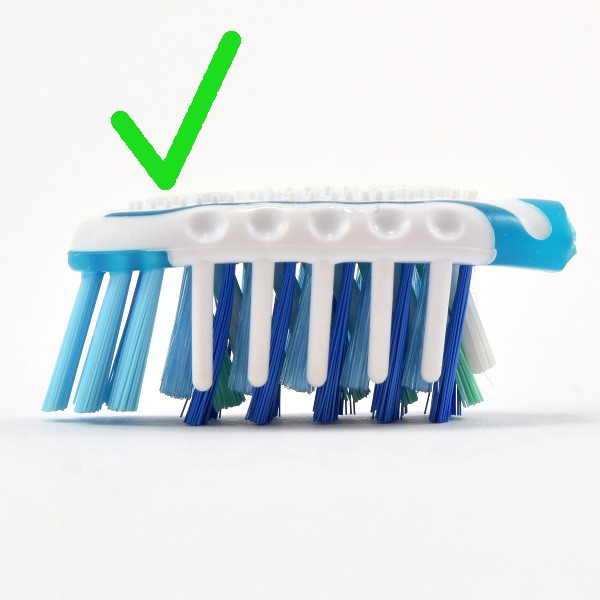
ane. Cut the heads off two toothbrushes with slanted bristles.
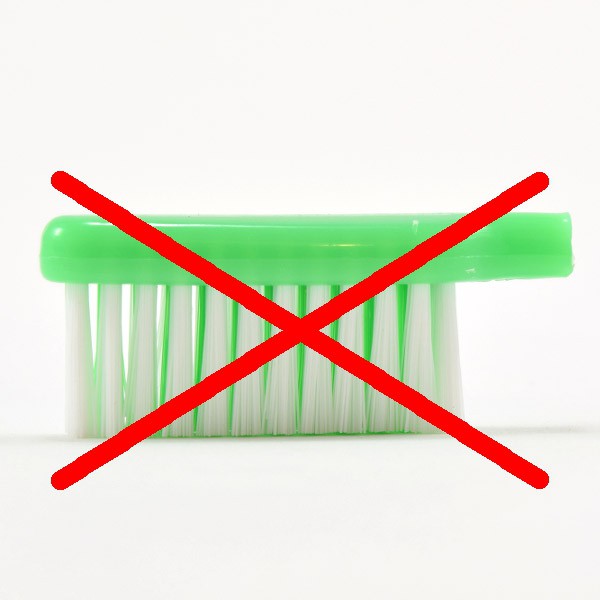
2. Do not use toothbrushes with straight bristles for this projection, or your robot will non work.
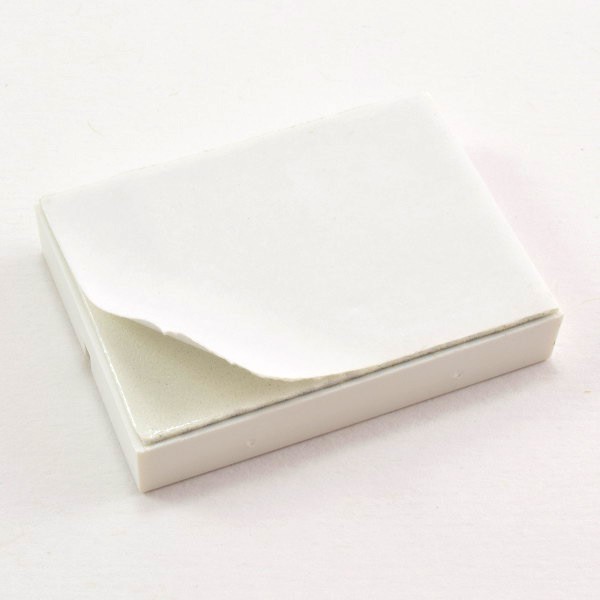
3. Skin the paper backing off the lesser of the breadboard to expose the viscid tape.
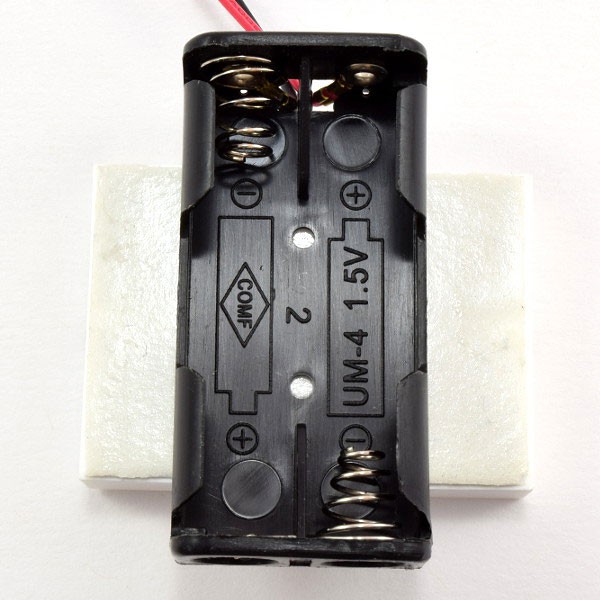
iv. Mountain the battery holder to the sticky tape, equally shown. Make sure it is centered on the breadboard.
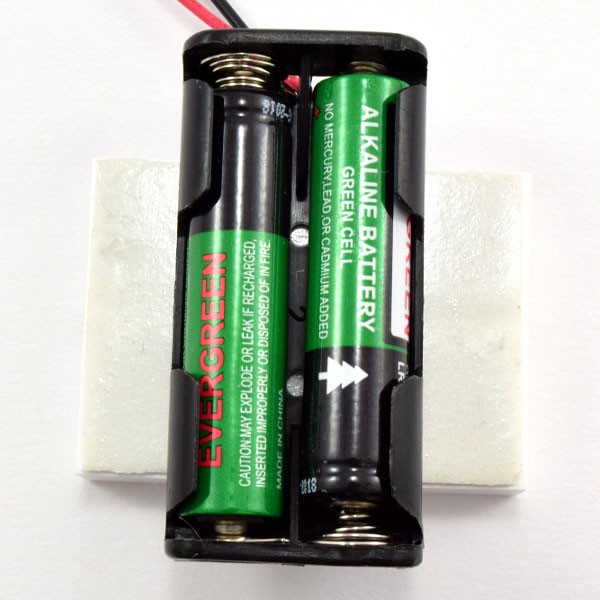
five. Insert the AAA batteries into the battery holder. Printing the flat ends of the batteries up confronting the metal springs.
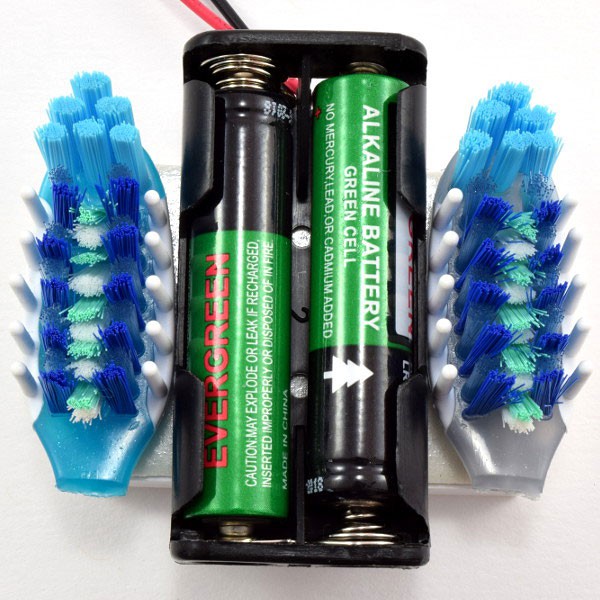
6. Attach the 2 toothbrush heads on either side of the battery holder. Make sure to mount them symmetrically.
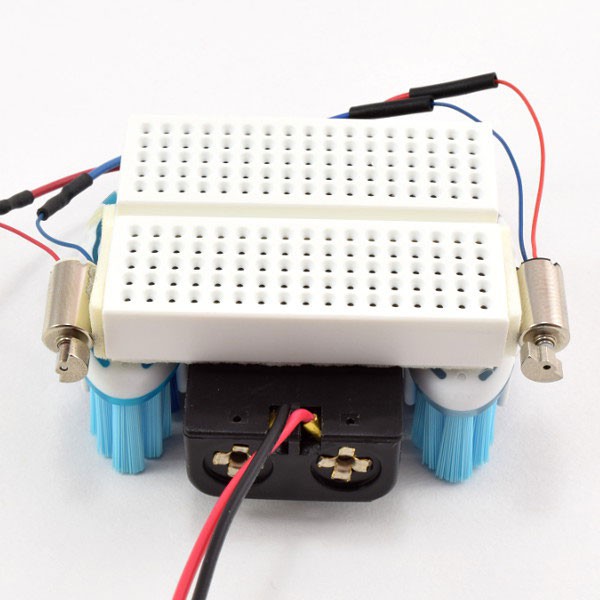
seven. Attach the two vibration motors to the sides of the breadboard using double-sided foam tape. Make sure the small weights on the motors can spin freely and not get stuck.
End of Slideshow Images
Advanced Display Boards
Additional Resources
- Experienced science fair goers may also desire to read up on our Advanced Display Lath Design and Tips.
- Students headed to top science competitions should read nigh Big Display Boards for Summit Fairs.
Checklist
Science Fair Project Display Board Checklist
Explore Our Science Videos
Balloon Car: 2022 Fluor Technology Challenge
How to Make an Archimedes Screw - STEM Activity
Gratis science fair projects.

How To Set Up A Science Fair Project Board,
Source: https://www.sciencebuddies.org/science-fair-projects/science-fair/science-fair-project-display-boards
Posted by: floresmonal1958.blogspot.com
0 Response to "How To Set Up A Science Fair Project Board"
Post a Comment